Cuisinart 2-in-1 Coffee Maker Manual: A Comprehensive Guide
This manual details operation of the Cuisinart DCC 1200, offering instructions for water reservoir filling, ground addition, and brewing procedures. It also covers safety warnings and cleaning guidelines.
Understanding Your Cuisinart Coffee Maker
Your Cuisinart 2-in-1 coffee maker is designed for both full pot and single-serve brewing, offering versatility to suit your needs. This manual serves as a guide to unlock its full potential, ensuring consistently delicious coffee. Familiarize yourself with the machine’s capabilities – it’s more than just a standard drip coffee maker!
The DCC-1200 model, and similar variants, combines traditional brewing with the convenience of single-cup brewing using K-Cup pods (where applicable) or a reusable filter. Understanding this dual functionality is key. The provided documentation explains how to navigate these options effectively. It details the main control elements, allowing for easy setup, operation, and cleaning.

Before first use, carefully review the safety instructions to prevent accidents and ensure longevity of your appliance. This coffee maker is designed for household use only, and proper care will maximize its performance. Remember to save this manual for future reference, as it contains valuable troubleshooting tips and warranty information.
Model Identification: DCC-1200 & Similar
This manual primarily focuses on the Cuisinart DCC-1200, a popular 2-in-1 coffee maker model. However, the instructions are largely applicable to similar Cuisinart coffee makers with comparable features, including those utilizing both drip and single-serve brewing capabilities. Variations may exist in specific button layouts or programmable settings, but the core principles remain consistent.
Identifying your specific model is crucial for accessing the most accurate support resources. Check the base of your coffee maker for the model number. While this guide covers the DCC-1200 extensively, referencing the dedicated documentation for your exact model (if available) is always recommended.
Other related models may include variations like the DGB-900BC or DGB-700BC, though these may feature different functionalities. The core operation of filling the reservoir, adding grounds, and initiating the brew cycle will share similarities. Always prioritize safety and consult the provided documentation for your specific unit.
Important Safety Instructions
Before operating your Cuisinart 2-in-1 coffee maker, carefully read all instructions to minimize the risk of injury or damage. This appliance is intended for household use only. Never immerse the coffee maker, cord, or plug in water or other liquids. Avoid operating the appliance with a damaged cord or plug, or after a malfunction.
Always ensure the coffee maker is properly grounded. Do not touch hot surfaces; use handles or knobs. Exercise extreme caution when handling hot liquids. Keep the appliance out of reach of children. Unplug the coffee maker from the outlet when not in use and before cleaning.
Allow the coffee maker to cool completely before disassembling or cleaning. Never use abrasive cleaners or scouring pads, as they can damage the surface. Regularly descale the coffee maker to maintain optimal performance and prevent mineral buildup. Failure to follow these safety instructions may result in electric shock, fire, or personal injury.
Key Components & Parts Overview
The Cuisinart 2-in-1 coffee maker comprises several key components essential for its operation. These include the water reservoir, designed for easy filling and accurate water level indication. The filter basket accommodates standard paper filters or a reusable gold-tone filter for brewing. A removable drip tray catches any spills, ensuring a clean countertop.
The carafe, typically glass, keeps brewed coffee warm. Control buttons manage power, brewing functions, and programmable settings. For single-serve brewing, a K-Cup pod holder (if applicable) or a single-serve filter is utilized. The appliance features a spray head that evenly saturates the coffee grounds.
Additional components include the power cord, housing, and often a self-cleaning function indicator. Understanding the function of each part is crucial for proper use and maintenance, ensuring optimal coffee brewing and longevity of your Cuisinart coffee maker.

Setting Up Your Coffee Maker
Initial setup involves cleaning the appliance and familiarizing yourself with its parts. Proper setup ensures optimal performance and delicious coffee with your new Cuisinart machine.
Initial Setup & Cleaning Procedure
Before your first brew, a thorough cleaning is essential. Remove all packaging materials and inspect the coffee maker for any damage. Wash the carafe, filter basket, and any removable parts with warm, soapy water. Rinse them completely and dry thoroughly.
Next, run a full brewing cycle with water only – without any coffee grounds. This helps to flush out any residual manufacturing residue and ensures a clean, fresh taste for your first pot. Fill the water reservoir to its maximum capacity and initiate a brewing cycle as if you were making coffee.
Discard the water from the carafe after the cycle completes. You may repeat this process once or twice for optimal cleanliness. This initial cleaning procedure is crucial for maintaining the longevity and performance of your Cuisinart coffee maker, guaranteeing a delightful coffee experience from the very beginning. Always refer to the full manual for detailed instructions and safety precautions.
Water Reservoir: Filling & Capacity
The Cuisinart 2-in-1 coffee maker features a clearly marked water reservoir, designed for easy filling and accurate measurement. Locate the reservoir, typically at the rear of the unit, and lift the lid to access it. Use fresh, cold, filtered water for the best tasting coffee.
The reservoir has a maximum capacity, usually indicated by a “MAX” fill line. Do not exceed this line, as overfilling can cause overflow during the brewing process. The reservoir is often marked with cup measurements, allowing you to easily add the appropriate amount of water for your desired number of cups.
Ensure the reservoir is securely seated before starting a brewing cycle. Some models feature a removable reservoir for convenient filling under the faucet. Regularly check the reservoir for any mineral buildup and clean as needed to maintain optimal performance. Proper water levels are key to a perfect brew!
Filter Basket: Types & Placement
The Cuisinart 2-in-1 coffee maker utilizes a filter basket to hold your coffee grounds, ensuring a clean and flavorful brew. This basket typically accommodates either permanent reusable filters or standard paper filters. Locate the filter basket – it’s usually a swing-out or lift-out component within the coffee maker.
If using a paper filter, ensure it’s the correct size for the basket to prevent grounds from overflowing. Place the filter securely within the basket. For the reusable filter, simply ensure it’s clean and properly seated. The filter basket’s placement is crucial; it must be correctly positioned to allow water to drip through the grounds and into the carafe.
Regularly clean the filter basket after each use to remove coffee residue. A clean basket prevents stale flavors from affecting future brews. Some models have a gold-tone permanent filter, offering convenience and reducing paper waste. Always check the manual for specific filter recommendations for your model.
Brewing Coffee
To brew, add grounds to the filter basket, fill the water reservoir, and select your desired brew strength. The Cuisinart DCC 1200 offers both full pot and smaller batch options.
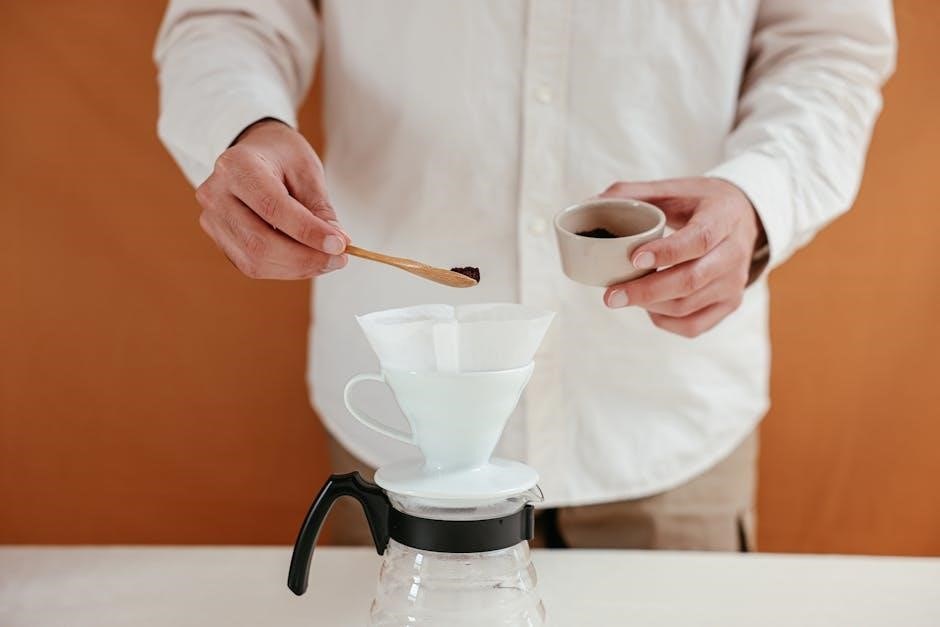
Adding Coffee Grounds: Recommended Amounts
Determining the correct amount of coffee grounds is crucial for achieving your preferred brew strength. As a general guideline, Cuisinart recommends using approximately two tablespoons of ground coffee per six ounces of water. However, this is merely a starting point, and personal preference plays a significant role.
For a full carafe – typically 12 cups (60 ounces) – you’ll need around 24 tablespoons of ground coffee. Adjust this amount based on how bold you like your coffee. If you prefer a milder flavor, reduce the amount slightly; for a stronger brew, increase it.
The grind size also impacts the flavor. A medium grind is generally recommended for drip coffee makers like the DCC-1200. Using a grind that is too fine can lead to over-extraction and a bitter taste, while a grind that is too coarse may result in under-extraction and a weak, watery coffee. Experiment with different grind sizes to find what works best for your palate and coffee beans. Remember to always use fresh, quality coffee beans for the best results!
Brewing a Full Pot of Coffee
To brew a full pot with your Cuisinart DCC-1200, begin by ensuring the water reservoir is filled with the desired amount of fresh, cold water. Next, place a paper filter (or a reusable filter) into the filter basket and add the appropriate amount of ground coffee – approximately 24 tablespoons for a 12-cup pot, adjusting to your taste.
Close the lid securely and place the carafe onto the warming plate. Press the “Power” button to turn on the coffee maker. Then, press the “Brew” button to initiate the brewing cycle. The coffee maker will automatically heat the water and drip it through the grounds, filling the carafe with delicious coffee.
The brewing time will vary depending on the amount of water used, but a full pot typically takes around 10-12 minutes to brew. Once brewing is complete, the coffee maker will automatically switch to the “Keep Warm” function, maintaining the coffee’s temperature for a set period. Enjoy your freshly brewed coffee!
Brewing Smaller Batches (Adjustable Settings)
The Cuisinart DCC-1200 allows for brewing smaller batches, offering flexibility beyond a full pot. To brew a smaller amount, simply reduce the amount of water added to the reservoir, corresponding to the desired number of cups. Use the water level indicator on the reservoir to accurately measure.
Add the appropriate amount of coffee grounds to the filter – generally, one tablespoon per cup is a good starting point, adjusting to your preference. Press the “Power” button, then the “Brew” button to start the process. The coffee maker will adjust the brewing time accordingly;
For precise control, some models feature “Small Batch” or “1-4 Cup” settings. These optimize the brewing process for smaller volumes, ensuring optimal flavor extraction. Experiment with different coffee-to-water ratios to find your perfect cup, even when brewing less than a full pot. Enjoy the convenience of customized brewing!
Programmable Features: Setting the Clock
Accurate time setting is crucial for utilizing the Cuisinart’s programmable features, particularly the Auto-Brew function. To set the clock, locate the “Clock” or “Time Set” button – its location may vary slightly depending on the specific model. Press and hold this button until the hour display begins to flash.
Use the “Hour” and “Minute” buttons to adjust the time to the correct setting. Ensure you observe the AM/PM indicator to set the correct time of day. Once the desired time is displayed, press the “Clock” or “Time Set” button again to confirm and save the setting.
A correctly set clock ensures the Auto-Brew function activates at your desired time. Refer to your model’s specific instructions for any unique clock-setting procedures. Regularly verify the clock’s accuracy, especially after power outages, to maintain reliable automated brewing.
Auto-Brew Function: Scheduling Coffee
The Auto-Brew feature allows you to wake up to freshly brewed coffee. After setting the clock (refer to the previous section), locate the “Auto-Brew” or “Program” button. Press this button, and the display will likely prompt you to set the desired brew start time.
Use the “Hour” and “Minute” buttons to input the time you want the coffee maker to begin brewing. Confirm your selection by pressing the “Auto-Brew” or “Program” button again. An indicator light will illuminate, confirming the Auto-Brew function is activated.
Ensure the coffee maker is filled with water and coffee grounds before activating Auto-Brew. The Cuisinart will automatically initiate brewing at the programmed time. To deactivate, press the “Auto-Brew” button again, turning off the indicator light. Regularly check the programmed time, especially after power interruptions.
2-in-1 Functionality: Single-Serve Brewing
This Cuisinart model offers single-serve brewing using K-Cup pods or a reusable filter. Adjust brew strength for personalized flavor, enjoying convenience alongside full-pot options.
Using K-Cup Pods (If Applicable)
For single-serve brewing with K-Cup pods, ensure the machine is compatible – not all Cuisinart 2-in-1 models support this feature. Lift the single-serve brew basket and insert a K-Cup pod firmly into the designated holder. Close the brew basket securely; the machine won’t operate if it’s not properly latched.
Select your desired cup size using the appropriate button on the control panel. The Cuisinart DCC-1200 typically offers options like 6oz, 8oz, 10oz, and 12oz. Place a mug or cup on the drip tray beneath the brew spout. Initiate the brewing process by pressing the single-serve brew button.
The machine will automatically pierce the K-Cup pod and brew directly into your cup. Once brewing is complete, carefully remove the used K-Cup pod, as it may be hot. Dispose of the pod responsibly. Remember to always use genuine K-Cup pods for optimal performance and to avoid potential issues with the brewing mechanism.
Single-Serve Filter: Alternative Options
If you prefer not to use K-Cup pods, or your model doesn’t support them, the Cuisinart 2-in-1 coffee maker allows for ground coffee in the single-serve mode. Utilize the included reusable single-serve filter basket. This basket replaces the K-Cup pod holder within the brew basket assembly.
Add one to two tablespoons of ground coffee into the reusable filter, adjusting to your desired strength. Ensure the grounds are evenly distributed. Close the brew basket securely, and select your preferred cup size using the control panel buttons – typically ranging from 6oz to 12oz.
Place a mug on the drip tray and initiate the brewing process by pressing the single-serve brew button. The machine will brew directly into your cup. After brewing, carefully remove the filter basket and dispose of the used coffee grounds. Thoroughly rinse the reusable filter after each use to prevent buildup and maintain optimal flavor.
Adjusting Single-Serve Brew Strength
The Cuisinart 2-in-1 coffee maker offers control over the strength of your single-serve brew, allowing for a customized coffee experience. While some models feature a dedicated “Bold” or “Strong” brew setting for single-serve, adjustments can also be made manually.
For a bolder flavor, increase the amount of coffee grounds used in the reusable filter – experiment with adding up to two tablespoons. Conversely, for a milder brew, reduce the amount to one tablespoon. The fineness of the grind also impacts strength; a finer grind generally yields a stronger cup.
Consider the water volume selected. Using less water with the same amount of coffee grounds will result in a stronger brew. Explore different combinations of coffee amount and water volume to discover your preferred strength. Regularly cleaning the machine also contributes to optimal flavor extraction and consistent brew strength.

Cleaning & Maintenance
Regular cleaning ensures optimal performance and longevity of your Cuisinart coffee maker. This includes descaling, cleaning removable parts, and following a consistent cleaning schedule.
Regular Cleaning Schedule
To maintain peak performance and extend the life of your Cuisinart 2-in-1 coffee maker, a consistent cleaning schedule is crucial. Daily, after each use, rinse the carafe, filter basket, and any removable parts with warm, soapy water. Ensure all soap residue is thoroughly removed before reassembling.
Weekly, a more detailed cleaning is recommended. Wash the water reservoir with mild dish soap and water, paying attention to any potential mineral buildup. Inspect the spray head for clogs and clean as needed; Wipe down the exterior of the coffee maker with a damp cloth.
Monthly, descaling is essential, especially if you have hard water. Descaling removes mineral deposits that can affect brewing temperature and coffee flavor. Use a commercially available descaling solution or a mixture of white vinegar and water, following the manufacturer’s instructions. Run a full brewing cycle with the descaling solution, then two full cycles with fresh water to rinse thoroughly. Consistent adherence to this schedule will guarantee optimal brewing and a longer lifespan for your appliance.

Descaling the Coffee Maker
Regular descaling is vital for maintaining your Cuisinart 2-in-1 coffee maker’s performance. Mineral deposits from water accumulate over time, hindering brewing efficiency and affecting coffee taste. The frequency depends on water hardness; monthly is generally recommended, but more often if you notice slower brewing or visible buildup.
To descale, begin by emptying the carafe and filter basket. Prepare a descaling solution – either a commercial descaling product specifically for coffee makers, or a mixture of equal parts white vinegar and water. Fill the water reservoir with the solution.
Run a full brewing cycle without coffee grounds. Once complete, allow the solution to sit in the coffee maker for 30-60 minutes. Afterwards, run two to three full brewing cycles with fresh, clean water to thoroughly rinse away any remaining descaling solution and vinegar taste. This ensures no residual chemicals affect your next brew. Repeat if necessary, until the water runs clear.
Cleaning Removable Parts (Carafe, Filter Basket)
Consistent cleaning of removable parts ensures optimal hygiene and coffee flavor. After each use, promptly empty the used coffee grounds and rinse the filter basket with warm, soapy water. The carafe should also be washed with warm, soapy water after every brewing cycle. Avoid abrasive cleaners or scouring pads, as these can damage the glass carafe.
For stubborn coffee stains in the carafe, a paste of baking soda and water can be effective. Apply the paste, let it sit for a few minutes, then gently scrub and rinse thoroughly. The filter basket is typically dishwasher safe (top rack recommended), but check your specific model’s instructions.
Ensure all parts are completely dry before reassembling the coffee maker. Regularly inspect the carafe for cracks or chips, and replace if damaged. Proper cleaning extends the lifespan of your Cuisinart and guarantees a consistently delicious coffee experience.
Troubleshooting Common Issues
If your Cuisinart coffee maker isn’t brewing, first ensure it’s properly plugged in and the power is on. Check if the water reservoir is filled to the appropriate level, as the unit won’t operate when empty. A common issue is mineral buildup; descaling (see dedicated section) often resolves this.
For slow brewing, confirm the filter isn’t clogged and the coffee grounds aren’t packed too tightly. If coffee overflows, reduce the amount of coffee grounds used. If the unit displays an error message, consult the full manual for specific code definitions.
If the single-serve function isn’t working, verify a K-Cup pod (if applicable) is correctly inserted or that the single-serve filter is properly placed. Always unplug the unit before attempting any internal inspection or repair. If problems persist, contact Cuisinart support for assistance.
Warranty Information & Support
Cuisinart provides a limited warranty on the DCC-1200 and similar 2-in-1 coffee makers, typically covering defects in materials and workmanship for a specified period from the date of purchase. Retain your proof of purchase for warranty claims.
The warranty does not cover damage resulting from misuse, accidents, or unauthorized repairs. For warranty service, do not return the unit to the retailer. Instead, contact Cuisinart’s customer support team directly.
Cuisinart’s support can be reached through their website (www.cuisinart.com), where you can find FAQs, downloadable manuals, and contact information for phone and email support. They also offer a range of replacement parts and accessories. Registering your product online can streamline the support process. Detailed warranty terms and conditions are available in the included documentation.