
Mantis Tiller User Manual: A Comprehensive Guide
Welcome to the definitive resource for your Mantis tiller! This manual provides detailed instructions, troubleshooting, and maintenance guidance for optimal performance and longevity.
Explore model-specific details, safety precautions, and contact information for Mantis Support at 1-800-366-6268, ensuring a seamless tilling experience.
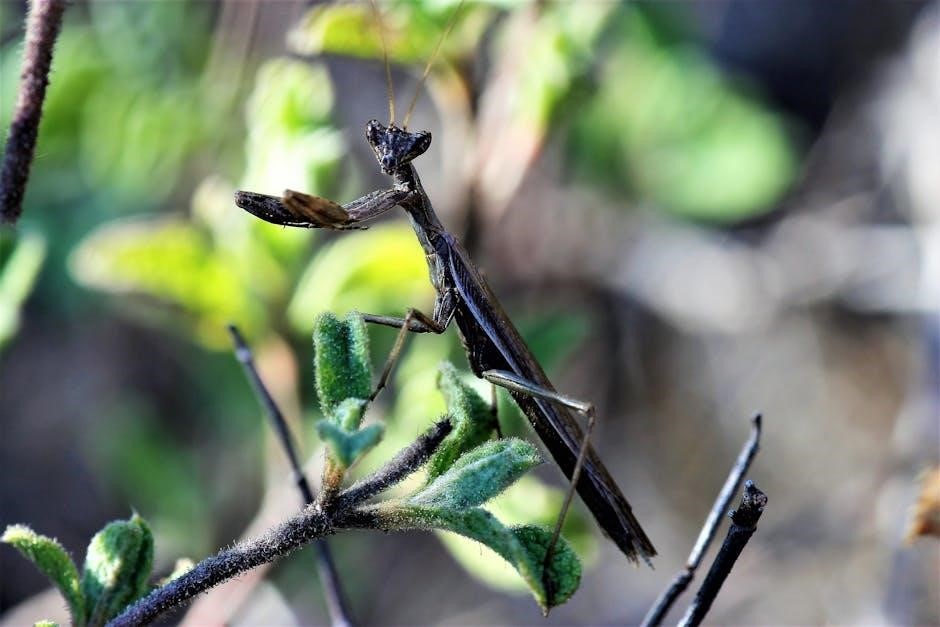
Mantis Tillers have earned a reputation for being lightweight, durable, and exceptionally versatile gardening tools. Designed for both homeowners and professionals, these tillers excel at breaking up compacted soil, preparing garden beds, and incorporating amendments with ease. Their compact size allows for maneuverability in tight spaces, making them ideal for smaller gardens and raised beds.
This user manual serves as a comprehensive guide to understanding, operating, and maintaining your Mantis tiller. Whether you own a classic 7000 series or a newer XP model – identified by the series and engine type – this resource will help you maximize its potential. Knowing your model number, like the F400 Rorovator, is crucial for parts compatibility and specific maintenance procedures.
We’ll cover everything from pre-operational checks and starting procedures to advanced tilling techniques and troubleshooting common issues. Remember, proper maintenance, including gear replacement on the tine shaft, is key to extending the life of your Mantis tiller.
Safety Precautions
Prioritizing safety is paramount when operating your Mantis tiller. Always wear appropriate safety glasses or a face shield to protect your eyes from flying debris. Sturdy footwear is essential, and avoid loose clothing that could become entangled in the rotating tines.
Before starting the tiller, thoroughly inspect the work area, removing any rocks, sticks, or other objects that could be thrown or cause damage. Never operate the tiller while under the influence of drugs or alcohol. Keep children and pets well clear of the operating area at all times.
Ensure the tiller is properly assembled and all guards are in place. If performing maintenance, always disconnect the spark plug wire to prevent accidental starting. Familiarize yourself with the emergency stop mechanism and know how to use it quickly. Refer to the full manual for detailed safety guidelines.
Understanding Your Mantis Tiller Model
Identifying your specific Mantis tiller model is crucial for proper maintenance and parts replacement. The model number, such as F400 Rorovator, reveals key information about the tiller’s series, engine type, and features. This differentiation is vital when sourcing compatible components.
Distinguishing between the Mantis 7000 series and newer XP models is particularly important. XP models often incorporate updated designs and features. Locate the model number on the tiller’s frame, typically near the engine or transmission.
Understanding these distinctions ensures you’re using the correct procedures and parts outlined in this manual. Refer to the parts identification section to familiarize yourself with the components specific to your model. Knowing your tiller’s specifics maximizes its performance and lifespan.
Identifying the Model Number (F400 Rorovator)
Locating the model number is the first step towards effective maintenance and repair of your Mantis tiller. For the F400 Rorovator model, the number is typically found directly on the tiller’s frame. Inspect the area surrounding the engine and transmission housing carefully.
The model number is often stamped or affixed with a durable label. It’s a unique identifier that distinguishes your tiller from others, ensuring you order the correct replacement parts. This number is critical for parts compatibility and accessing model-specific documentation.
Record this number in a safe place for future reference. When contacting Mantis Support at 1-800-366-6268, or ordering parts online, having the model number readily available will expedite the process and guarantee accuracy.
Mantis 7000 Series vs. XP Models
Understanding the differences between the Mantis 7000 series and XP models is crucial for proper maintenance and parts selection. The 7000 series represents an earlier generation of Mantis tillers, while the XP models signify a newer, often upgraded design.
A key distinction lies in the engine and transmission components. XP models generally feature enhanced power and durability, with improved tilling performance. The model number will indicate which series you own; for example, a 7000 series number versus an XP designation.
Parts are often not interchangeable between these series. Always verify compatibility using the model number before ordering replacements. Referencing the Mantis Bug Tracker Wiki or contacting 1-800-366-6268 can clarify any doubts regarding specific parts for your tiller.
Parts Identification
Accurate parts identification is essential for successful repairs and maintenance of your Mantis tiller. Key components include the engine, tines, transmission, housing, and controls. The F400 rorovator, for instance, requires specific gear replacements for the tine shaft when wear occurs.
Understanding the function of each part aids in troubleshooting. The transmission, often requiring a vice for inspection, houses critical gears. The engine type – typically 2-cycle – dictates fuel and oil requirements. Refer to detailed diagrams and parts lists available through Mantis support or online resources.
Knowing your tiller’s series (7000 vs. XP) is paramount, as parts compatibility varies. Utilize the model number to ensure you order the correct replacement components. Explore the Mantis Bug Tracker for community insights on common part failures.
Assembly Instructions
Careful assembly is crucial for safe and efficient operation of your Mantis tiller. Begin by unpacking all components and verifying against the parts list. Attach the handles securely, ensuring proper alignment and tightening of all bolts. Next, install the tine set, confirming a snug fit onto the tine shaft.
Pay close attention to the transmission housing, ensuring it’s correctly positioned and fastened. For models like the F400 rorovator, proper tine shaft alignment is vital for gear longevity. Double-check all connections before proceeding.

Refer to the detailed diagrams included with your tiller. If encountering difficulties, consult the Mantis Bug Tracker or contact Mantis Support at 1-800-366-6268 for assistance. A properly assembled tiller guarantees optimal performance and minimizes potential issues.
Pre-Operational Checks
Before each use, perform essential pre-operational checks to ensure safe and reliable operation. First, meticulously inspect the tiller for any loose bolts or damaged components. Verify the tine set is securely attached and rotates freely. Crucially, check the fuel level for 2-cycle engines, ensuring the correct fuel-to-oil ratio is maintained.
Next, carefully examine the oil level, adding oil as needed to maintain proper lubrication. Confirm all safety shields and guards are in place and functioning correctly. For models like the F400 rorovator, inspect the tine shaft gear for wear.
If issues are found, consult the Mantis Bug Tracker or contact Mantis Support at 1-800-366-6268. These checks prevent potential hazards and maximize the lifespan of your Mantis tiller.
Fueling the Tiller (2-Cycle Engines)
Proper fueling is critical for 2-cycle Mantis tillers. Always use a fresh, high-quality fuel mix specifically formulated for 2-cycle engines. Typically, this involves a gasoline and 2-cycle oil blend, with the precise ratio varying by model – consult your specific tiller’s documentation.
Before refueling, ensure the engine is cool and the tiller is on a level surface. Carefully remove the fuel cap and slowly pour the fuel mixture into the tank, avoiding spills. Do not overfill.
After fueling, securely replace the fuel cap and wipe away any spilled fuel. Never fuel a hot engine! Refer to the Mantis resources or call 1-800-366-6268 if you have any questions regarding fuel specifications.
Checking Oil Levels
Maintaining correct oil levels is paramount for your Mantis tiller’s longevity. Locate the oil dipstick, usually situated near the engine. Before checking, ensure the tiller is on a level surface. Remove the dipstick, wipe it clean with a lint-free cloth, and fully reinsert it without screwing it in.
Remove the dipstick again and observe the oil level. It should fall within the “full” range indicated on the dipstick. If the level is low, carefully add the recommended oil type – consult your model’s documentation for specifics.
Avoid overfilling, as this can cause engine damage. Securely tighten the dipstick after checking or adding oil. Regular checks, especially before each use, will prevent costly repairs. For assistance, contact Mantis Support at 1-800-366-6268.
Starting the Mantis Tiller
Before attempting to start your Mantis tiller, ensure it’s on a stable, level surface and the tines are clear of obstructions. Verify the fuel tank is adequately filled with the correct fuel mixture for 2-cycle engines, and the oil level is correct. Engage the bail control lever – this is a crucial safety feature.
For most models, prime the engine by pressing the primer bulb several times until fuel is visible. Then, set the choke to the “start” position. Firmly grasp the starter grip and pull the cord with a smooth, controlled motion. Repeat as needed, gradually reducing choke application as the engine attempts to start.
Once running, slowly release the bail control to disengage the tines. If starting proves difficult, consult the troubleshooting section or contact Mantis Support at 1-800-366-6268.
Operating Instructions
Always maintain a firm grip on the handles and engage the bail control lever during operation. Begin tilling in a straight line, allowing the tiller to self-propel. Overlap each pass slightly for thorough soil cultivation. Adjust your walking speed to match the soil conditions and desired tilling depth.
For cultivating techniques, use a shallower depth and slower speed. The Mantis tiller excels at weeding between rows and incorporating amendments into the soil. Avoid forcing the tiller through hard-packed areas; multiple passes at a lower depth are more effective.
Be mindful of obstacles like rocks and roots. If encountering resistance, disengage the tines and clear the obstruction before continuing. Remember safety first!
Tilling Techniques
Effective tilling with your Mantis requires understanding soil types and conditions. For initial garden preparation, till to a depth of 6-8 inches, breaking up compacted soil and incorporating organic matter. Overlap each pass by approximately one-third of the tine width to ensure complete coverage and avoid leaving unturned soil.
When dealing with heavy clay soil, make multiple passes at shallower depths rather than attempting a single deep pass. This prevents stalling and reduces strain on the tiller. For lighter, sandy soils, a single pass at the desired depth is usually sufficient.
Maintain a consistent walking pace and allow the tiller to do the work. Avoid pushing or pulling excessively, as this can lead to uneven tilling and operator fatigue.
Cultivating Techniques
Cultivation differs from tilling; it’s for maintaining existing gardens. Use a shallower depth – 2-3 inches – to aerate the soil, control weeds, and incorporate fertilizer. Frequent, light cultivation is more beneficial than deep, infrequent tilling for established plants.
Carefully maneuver around existing plants, avoiding damage to roots and stems. The Mantis tiller’s compact size makes it ideal for working in tight spaces between rows. For weed control, focus on cultivating along rows and around plant bases, disturbing weed seedlings at the surface.
Remember to adjust the tilling depth accordingly and maintain a steady pace. Regular cultivation improves soil health and promotes vigorous plant growth, enhancing your garden’s productivity.
Adjusting Tilling Depth
Precise depth control is crucial for effective tilling. The Mantis tiller allows for easy adjustment of tilling depth to suit various soil conditions and gardening tasks. Locate the depth adjustment lever, typically positioned near the tiller’s handle or drive housing.
Moving the lever forward increases tilling depth, while moving it backward decreases depth. Start with a shallower depth for initial passes, especially in compacted or rocky soil. For breaking new ground, a deeper setting – up to 8 inches – may be necessary.
Always test the depth in a small area before tilling a larger section. Monitor the tiller’s performance and adjust as needed to achieve the desired results. Proper depth adjustment optimizes tilling efficiency and prevents damage to the machine.
Maintaining Your Mantis Tiller
Regular maintenance ensures your Mantis tiller’s longevity and peak performance. After each use, clean the tiller thoroughly, removing soil and debris from the tines and housing. Inspect the tines for wear and tear, replacing them as needed.
Periodically check and tighten all bolts and fasteners. Gear replacement, specifically of the tine shaft, may be required over time; consult the parts list for compatibility. Follow a regular maintenance schedule, including oil changes (for 4-cycle models) and spark plug replacement.
Store the tiller in a dry, protected area. Proper maintenance prevents costly repairs and keeps your Mantis tiller ready for years of reliable service. Refer to the troubleshooting section for common issues.
Gear Replacement (Tine Shaft)
Replacing the tine shaft gear is a crucial maintenance task for your Mantis tiller. Begin by removing the cover and securing the transmission in a vice for stability. Carefully turn the tine shaft by hand to access the worn gear.
Ensure you have the correct replacement gear, referencing your model number (like F400 rorovator) for compatibility. Gently remove the damaged gear, noting its orientation for proper installation of the new one. Apply a small amount of grease to the new gear before installation.
Reassemble the transmission, ensuring the gear meshes correctly with the other components. This repair restores efficient tilling power.
Regular Maintenance Schedule
Maintaining your Mantis tiller ensures years of reliable service. After each use, clean debris from the tines and engine. Monthly, check and tighten all bolts and fasteners. Inspect the fuel lines for cracks or leaks, and replace as needed.
Annually, change the oil (for 4-cycle models) and inspect the air filter, cleaning or replacing it as necessary. Don’t forget to address the tine shaft gear, as wear is common. Utilize resources like the Mantis Bug Tracker Wiki for community insights.
Following this schedule, alongside referencing your specific model (Mantis 7621 Tiller or Mantis 7222 Tiller/Cultivator), will maximize performance and minimize downtime.
Troubleshooting Common Issues
Encountering problems? This section addresses frequent Mantis tiller issues. If the tiller won’t start, check the fuel level, spark plug, and air filter. A clogged fuel line or a fouled spark plug are common culprits. For difficult starting, ensure fresh fuel is used, especially with 2-cycle engines.
If tilling is ineffective, verify the tines are securely attached and in good condition. A worn tine shaft gear can also cause this – consider gear replacement. Refer to the Mantis Bug Tracker for community-reported solutions.
Remember Mantis Support at 1-800-366-6268 is available for assistance. Always disconnect the spark plug before performing any maintenance or troubleshooting.
Understanding the Transmission
The Mantis tiller’s transmission is a critical component for power transfer. It converts the engine’s rotational force into the movement of the tines, enabling effective soil cultivation. Understanding its function aids in maintenance and repair.
Accessing the transmission often requires removing the cover and securing it in a vice. Inspecting the tine shaft gear is crucial; wear is a common issue leading to reduced tilling performance. Replacement is often necessary, and detailed instructions can be found online or through Mantis Support at 1-800-366-6268.
Regularly check for leaks or unusual noises, indicating potential transmission problems. Consult the Mantis Bug Tracker for known issues and solutions related to specific models.
Contacting Mantis Support (1-800-366-6268)
For dedicated assistance with your Mantis tiller, reach out to their expert support team at 1-800-366-6268. This is the primary channel for resolving complex issues, obtaining specific parts information, and clarifying any uncertainties regarding operation or maintenance.
Before calling, have your model number (like F400 Rorovator) readily available to expedite the process. Be prepared to describe the problem in detail, including any recent maintenance performed. The support team can guide you through troubleshooting steps or arrange for necessary repairs.
Additionally, explore the Mantis Bug Tracker & Wiki Resources online for self-service solutions and community insights. However, for personalized support, 1-800-366-6268 remains your direct line to Mantis expertise.
Mantis Bug Tracker & Wiki Resources
Enhance your Mantis tiller experience with access to the comprehensive Bug Tracker & Wiki Resources! This online platform serves as a collaborative hub for users to report issues, share solutions, and contribute to a growing knowledge base.

The Mantis Bug Tracker allows you to view publicly reported problems and track their resolution status. While full participation requires login, anonymous browsing provides valuable insights. The integrated Wiki offers detailed documentation, troubleshooting guides, and maintenance procedures.
Access these resources to potentially resolve issues independently before contacting Mantis Support at 1-800-366-6268. Remember that the Wiki is constantly evolving thanks to community contributions, ensuring up-to-date information for all Mantis tiller owners.
Mantis Tiller Models Overview
Discover the diverse range of Mantis tiller models designed to meet various gardening needs! Understanding the specific features of your model is crucial for optimal performance and proper maintenance. Key models include the versatile Mantis 7621 Tiller, known for its robust construction and efficient tilling capabilities.
The Mantis 7222 Tiller/Cultivator offers a dual-purpose solution, excelling in both tilling and cultivating tasks. Older models, such as the Mantis 7222 (2001-2004), utilize a 2-cycle gas engine. Identifying your model number – often indicated by a series like 7000 or XP – is vital for parts compatibility and accessing model-specific documentation.
Refer to your tiller’s documentation or contact Mantis Support at 1-800-366-6268 to confirm your exact model and its unique specifications.
Mantis 7621 Tiller
The Mantis 7621 Tiller represents a powerful and versatile gardening tool, designed for medium to large-sized gardens. This model boasts enhanced features for efficient soil preparation, making it ideal for breaking new ground or revitalizing existing garden beds.
Key characteristics include a robust engine and durable tines, capable of handling various soil types. Proper maintenance, including regular gear replacement of the tine shaft, is essential for longevity. Always refer to the comprehensive user manual for detailed operating instructions and safety precautions.

For specific parts or assistance, contact Mantis Support at 1-800-366-6268. Explore the Mantis Bug Tracker Wiki for community insights and troubleshooting tips, ensuring optimal performance from your 7621 Tiller.
Mantis 7222 Tiller/Cultivator
The Mantis 7222 Tiller/Cultivator is a highly adaptable machine, excelling in both initial soil preparation and ongoing garden maintenance. Produced from 2001-2004, this 2-cycle gas-powered model offers a compact design for maneuverability in tighter spaces.
Its dual functionality allows for effective tilling of new garden beds and precise cultivation between existing plants. Understanding your specific model year (e.g., 2001-01 to 2004-03) is crucial for parts compatibility. Regular maintenance, including checking oil levels and potential gear replacement, is vital.
For assistance identifying parts or resolving issues, contact Mantis Support at 1-800-366-6268. Consult the Mantis Bug Tracker Wiki and community forums for shared experiences and solutions, maximizing your 7222’s performance.
Offline Maintenance Procedures (cp mantis_offline.php.sample)
Scheduled downtime is occasionally necessary for system upgrades and critical maintenance of the Mantis support infrastructure. The mantis_offline.php.sample file provides a mechanism to temporarily disable access to the Mantis Bug Tracker and associated resources.
Implementing this file prevents users from submitting new issues or accessing existing data during the maintenance window. Proper deployment involves copying and renaming the sample file to mantis_offline.php in the designated directory.
Remember to remove the file once maintenance is complete to restore full functionality. This procedure ensures data integrity and a smooth user experience post-upgrade. Refer to the Mantis Bug Tracker Wiki for detailed instructions and best practices.
General Discussion & Community Forums
Connect with fellow Mantis tiller enthusiasts and share your experiences! The General Discussion forum serves as a central hub for all things Mantis, fostering a collaborative environment for users of all skill levels.

Discuss tilling techniques, troubleshooting tips, and modifications with a vibrant community. Moderators, including Developers and Contributors, actively participate, offering expert guidance and support. As of December 30, 2025, the forum boasts 2643 topics and 8893 posts, demonstrating its active user base.
Recent discussions include workflow improvements, ensuring a continuously evolving and helpful resource. Explore the forums to find answers, share your knowledge, and become part of the Mantis family!
Workflow & Bug Reporting
Contribute to the improvement of the Mantis tiller experience! This section details the process for reporting bugs and suggesting workflow enhancements, ensuring continuous development and refinement of the system.
The Mantis Bug Tracker Wiki is integrated with the bug reporting system, requiring user login for authenticated access. While publicly viewable as an anonymous user, full participation necessitates account creation. This allows for detailed bug submissions and tracking of resolution progress.
Recent discussions, as of January 28, 2026, focused on workflow clutter, highlighting the community’s commitment to streamlining the user experience. Your feedback is invaluable in shaping the future of Mantis tillers!
System Upgrade Procedures
Ensuring optimal performance requires periodic system upgrades. This section outlines the necessary steps to maintain the Mantis tiller’s software and functionality, guaranteeing a smooth and efficient operation.
Prior to initiating any upgrade, it is crucial to implement a maintenance procedure, utilizing the cp mantis_offline.php.sample file. This action effectively takes the site offline, preventing user access during the upgrade process and safeguarding data integrity.
The mantis_offline.php file disables system functionality, ensuring a stable environment for the upgrade. Following the upgrade, remember to revert this setting to restore full operational capacity. Regular upgrades are vital for security and feature enhancements!