Electrolux Dishwasher Owners Manual: A Comprehensive Guide
This comprehensive guide details safety, installation, operation, maintenance, and troubleshooting for your Electrolux dishwasher, ensuring optimal performance and longevity.
Welcome to the world of effortless dishwashing! This manual serves as your primary resource for understanding and maximizing the capabilities of your new Electrolux dishwasher. We’ve designed this appliance with innovative features to deliver sparkling clean dishes while conserving water and energy. Before operating, carefully review the safety precautions and installation guidelines detailed within this manual.
This guide provides step-by-step instructions, from initial setup and loading techniques to advanced settings and troubleshooting common issues. Familiarize yourself with the control panel, wash cycle options, and maintenance procedures to ensure optimal performance and a long lifespan for your dishwasher. Remember to retain this manual for future reference, as it contains vital information regarding your appliance’s operation and care.
Understanding the Dishwasher Components
Your Electrolux dishwasher comprises several key components working in harmony to deliver exceptional cleaning results. These include the spray arms – strategically positioned to reach all dish surfaces – and the powerful circulation pump that drives water through them. The filter system effectively traps food particles, preventing redeposition and ensuring hygienic operation.
The detergent dispenser automatically releases cleaning agents at the appropriate time during the wash cycle, while the rinse aid dispenser ensures spotless drying. Familiarize yourself with the interior layout, including adjustable racks and utensil baskets, to optimize loading capacity. Understanding these components and their functions will help you operate and maintain your dishwasher efficiently, maximizing its performance and longevity.

Safety Information & Instructions
Prioritize safety! Read all instructions carefully before operating your Electrolux dishwasher to prevent risks of injury, electrical shock, or damage to the appliance.
Important Safety Precautions
To ensure safe operation, always supervise children near the dishwasher. Never allow them to play with the controls or interior. Only use dishwasher detergent specifically designed for automatic dishwashers; other detergents can create dangerous fumes. Avoid storing flammable materials near the appliance.
Before any maintenance or cleaning, disconnect the dishwasher from the power supply. Do not attempt to repair the dishwasher yourself; contact a qualified technician. Ensure the door is ajar when not in use to prevent accidents. Keep the area around the dishwasher clear to allow for proper ventilation. Improper installation or use can void the warranty and create hazards. Always follow the manufacturer’s instructions detailed in this manual for optimal safety and performance.
Electrical Safety Guidelines
Prioritize electrical safety by ensuring the dishwasher is properly grounded. Never modify the power cord or plug. If the supply cord is damaged, it must be replaced by a qualified technician to avoid hazards. Do not use extension cords or adapters. The electrical connection should comply with local regulations and be performed by a certified electrician.
Avoid operating the dishwasher with a damaged power cord or if the electrical outlet is faulty. Disconnect the appliance from the power supply before cleaning or performing any maintenance. Never immerse the dishwasher or its power cord in water. Ensure the voltage indicated on the appliance matches the household voltage. Failure to adhere to these guidelines could result in electric shock or fire.
Proper Usage & Avoiding Damage
To maximize lifespan and performance, only use dishwasher-safe detergents and rinse aids. Avoid overloading the dishwasher, ensuring items don’t obstruct the spray arms. Do not wash items made of wood, aluminum, or delicate materials not intended for dishwashers. Keep the dishwasher door slightly ajar between cycles to prevent mildew.
Regularly inspect spray arms for blockages and clean them as needed. Avoid harsh abrasive cleaners on interior surfaces. Do not sit or stand on the dishwasher door, as this can cause damage. Proper loading and detergent usage are crucial. Following these guidelines will prevent premature wear and maintain optimal cleaning results, extending the appliance’s life.

Getting Started: Installation & First Use
Proper installation requires correct water and drain line connections, followed by an initial setup and a thorough first wash cycle for optimal function.
Installation Requirements & Checklist
Before installation, verify adequate space, electrical supply, and water/drain connections. Ensure a level floor for stable operation. The checklist includes confirming the correct voltage, water pressure (typically between 30-120 psi), and drain hose diameter.
Inspect the dishwasher for any shipping damage. A dedicated 15-amp circuit is generally required. Proper grounding is crucial for electrical safety. Confirm the water supply line is compatible and free of kinks.
The drain hose should loop high under the sink to prevent backflow. Read the full installation manual for detailed diagrams and specific requirements for your model. Failure to meet these requirements may void the warranty and compromise performance. Double-check all connections for leaks after installation.
Connecting Water & Drain Lines
Water connection requires a potable water supply line with a compatible fitting – typically a 3/8” or 1/2” compression connection. Use new supply hoses; do not reuse old ones. Ensure a tight, leak-proof connection, using Teflon tape if needed.
Drain line connection involves attaching the drain hose to the household drain or garbage disposal. Securely clamp the hose to prevent dislodgement. The drain hose should be elevated to prevent wastewater backflow, forming a high loop.
Avoid sharp bends or kinks in both water and drain lines. Check all connections thoroughly for leaks after installation and before operating the dishwasher. Refer to the detailed diagrams in the installation manual for specific guidance related to your model.
Initial Setup & First Wash Cycle
Before the first wash, verify the dishwasher is level and securely installed. Add rinse aid to the dispenser, adjusting the setting according to water hardness. Ensure the spray arms rotate freely and are unobstructed.
The initial wash cycle should be run empty, using a dishwasher detergent. Select a normal or eco wash cycle with a high-temperature rinse. This cleans the interior and removes any manufacturing residue.
Inspect for leaks during and after the cycle. Once completed, the dishwasher is ready for regular use. Refer to the ‘Loading the Dishwasher Correctly’ section for optimal results and to avoid damage.

Operating Your Dishwasher
Effectively utilize the control panel to select wash cycles, adjust settings, and monitor progress for sparkling clean dishes every time.
Control Panel Overview & Functions
The Electrolux dishwasher control panel is designed for intuitive operation, offering a range of functions to customize your wash cycles. Key components include the power button, cycle selection dial or buttons (such as Normal, Heavy, Delicate, Quick Wash, and Rinse Only), and option buttons for features like Delay Start and Extra Rinse.
Digital displays provide cycle progress information and error codes. Understanding the indicator lights – for detergent, rinse aid, and cycle status – is crucial. Some models feature a keypad lock for safety. The manual activation of detergent and rinse aid dispensers, often found in professional models, allows for manual control. Familiarize yourself with each button and indicator to maximize the dishwasher’s capabilities and achieve optimal cleaning results. Refer to your specific model’s diagram in the manual for precise locations and functions.
Wash Cycle Selection Guide
Choosing the correct wash cycle is vital for efficient cleaning and protecting your dishware. The Normal cycle suits everyday loads with moderate soiling. For heavily soiled pots and pans, select the Heavy cycle, utilizing higher temperatures and longer wash times. Delicate items, like glassware, benefit from the Delicate cycle’s gentle approach.
The Quick Wash cycle provides a faster clean for lightly soiled dishes. Utilize Rinse Only for pre-rinsing or when delaying a full wash. Some models offer specialized cycles like AutoSense, adjusting settings based on soil levels. Always consider the load’s size and soil level when selecting a cycle. Refer to the manual for specific recommendations and energy consumption details for each cycle option, ensuring optimal results and efficiency.
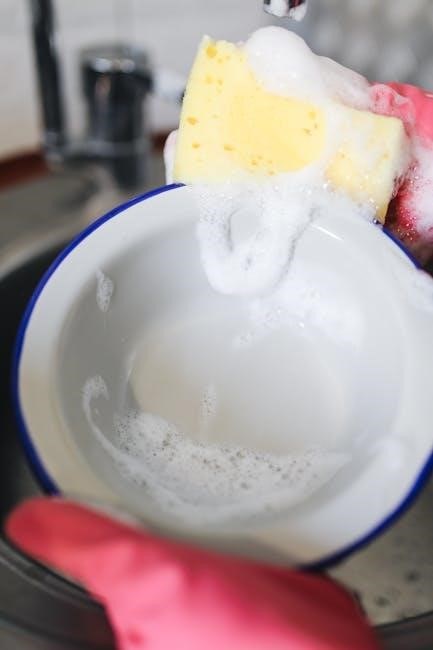
Loading the Dishwasher Correctly
Proper loading maximizes cleaning performance and prevents damage. Place items facing the spray arms, avoiding overcrowding. Position larger items on the bottom rack, ensuring they don’t block the detergent dispenser. Secure glasses and cups firmly in the upper rack, facing downwards.
Utensils should be placed in the cutlery basket with handles down for safety and effective cleaning. Avoid nesting items, allowing water to reach all surfaces. Remove large food particles before loading. Keep the dishwasher door ajar for some time before removing tableware. Incorrect loading can lead to poor cleaning results and potential damage to your dishes – consult your user manual for specific rack configurations and loading guidelines.
Maintenance & Cleaning
Regular maintenance ensures peak dishwasher performance. Clean the interior, filters, and spray arms routinely to prevent buildup and maintain optimal cleaning efficiency.
Cleaning the Dishwasher Interior
To maintain a fresh and hygienic dishwasher, regular interior cleaning is crucial. After each use, wipe down the door and control panel with a damp cloth. Periodically, run an empty wash cycle with a dishwasher cleaner or a cup of white vinegar placed in the upper rack to eliminate odors and dissolve grease buildup.
For stubborn stains or food residue, use a non-abrasive cleaner and a soft sponge. Avoid harsh chemicals or scouring pads, as they can damage the stainless steel interior. Pay attention to the door gasket, ensuring it’s clean and free of debris to maintain a proper seal. Leaving the door ajar after cycles helps prevent mildew growth. Consistent cleaning extends the life of your Electrolux dishwasher and ensures sparkling clean dishes.
Filter Cleaning Procedures
Maintaining a clean filter is essential for optimal dishwasher performance. Locate the filter assembly, typically at the bottom of the dishwasher interior. Remove the filter components – usually a cylindrical filter and a flat mesh filter – by twisting or unlocking them. Rinse these parts thoroughly under running water, using a soft brush to remove any trapped food particles or debris.
Inspect the filter for damage and replace if necessary. Reassemble the filter components correctly, ensuring they are securely locked into place. A clogged filter reduces cleaning efficiency and can cause drainage issues. Regular filter cleaning, ideally monthly or as needed, prevents buildup and ensures consistently clean dishes. Consult your model’s specific instructions for detailed filter removal and reinstallation steps.
Spray Arm Inspection & Cleaning
Regularly inspect the dishwasher’s spray arms for blockages. Locate the upper and lower spray arms – they rotate during the wash cycle to distribute water. Remove the spray arms, typically by unscrewing or unclipping them. Examine the spray arm holes for food particles or mineral deposits obstructing water flow.
Use a toothpick or small wire to carefully clear any blockages. Rinse the spray arms thoroughly under running water. Ensure the spray arms rotate freely after cleaning. Reattach the spray arms securely, verifying they are properly aligned. Blocked spray arms reduce cleaning effectiveness and can lead to uneven dishwashing results; Inspecting and cleaning them monthly maintains optimal performance.
Troubleshooting Common Issues
This section provides solutions for typical problems like the dishwasher not starting, poor cleaning, or drainage issues, ensuring efficient operation and resolving concerns.
Dishwasher Not Starting
If your Electrolux dishwasher fails to start, first verify the power supply. Ensure the dishwasher is properly plugged into a functioning electrical outlet and that the circuit breaker hasn’t tripped. Check if the door is securely latched, as the dishwasher won’t operate if the door isn’t fully closed.
Inspect the control panel for any locked or inactive settings; sometimes, a child lock feature might be enabled. Also, confirm that the start/pause button has been pressed correctly. If these checks don’t resolve the issue, there might be a problem with the thermal fuse or the control module, potentially requiring professional service. A reset of the dishwasher, by disconnecting power for a few minutes, can sometimes resolve minor electrical glitches.
Poor Cleaning Performance
Experiencing unsatisfactory cleaning results? Several factors could be at play. First, ensure proper loading – avoid overcrowding and blockages that prevent water from reaching all surfaces. Verify you’re using the correct amount of detergent, appropriate for water hardness and soil level. An insufficient amount won’t clean effectively, while too much can leave residue.
Check the spray arms for clogs; food particles can obstruct water flow. A dirty filter significantly reduces cleaning power, so regular cleaning is crucial. Also, confirm the water temperature is adequate – ideally, at least 120°F (49°C). Finally, consider using a rinse aid to improve drying and prevent water spots, enhancing overall cleaning performance.
Drainage Problems & Solutions
If your dishwasher isn’t draining properly, standing water can accumulate. Initially, check the drain hose for kinks or obstructions – ensure it isn’t bent or crushed. Inspect the air gap (if installed) for blockages; this prevents wastewater from flowing back into the dishwasher. A clogged filter is a common culprit, so remove and clean it thoroughly.
Furthermore, verify the drain pump isn’t jammed with debris like glass shards or food particles. If the issue persists, the drain pump itself might be faulty and require professional repair. Avoid using excessive detergent, as this can contribute to drainage issues. Regularly flushing the drain line with hot water can also help prevent build-up.

Advanced Features & Settings
Explore enhanced functionalities like Delay Start, adjustable rinse aid, and precise detergent dispensing for customized cleaning cycles and optimal dishwashing results.
Delay Start Function Explained
The Delay Start function allows you to conveniently schedule dishwasher operation for off-peak hours, potentially saving energy and money. This feature is particularly useful if you have time-of-use electricity rates or prefer a quieter operation during nighttime. To utilize this setting, simply press the ‘Delay Start’ button on the control panel, and select the desired delay duration – typically ranging from 30 minutes up to 24 hours.
The dishwasher will then automatically begin the selected wash cycle after the specified delay period. Ensure the detergent dispenser is loaded before setting the delay, as it will open automatically when the cycle initiates. Remember to consider the wash cycle length when setting the delay to ensure completion at a convenient time. This function provides flexibility and control over your dishwashing routine.
Rinse Aid Dispenser Adjustment
Proper rinse aid usage is crucial for spotless, streak-free dishes and faster drying. Your Electrolux dishwasher features an adjustable rinse aid dispenser to customize performance based on water hardness. If you notice spotting or filming on your dishes, increase the rinse aid level. Conversely, if dishes appear cloudy, reduce the setting.
The dispenser typically has numbered settings, with higher numbers indicating greater rinse aid release. To adjust, locate the dispenser (usually inside the dishwasher door) and rotate the dial to the desired level; Begin with the middle setting and adjust incrementally until optimal results are achieved. Regularly check the rinse aid level indicator and refill as needed to maintain consistent performance. Using the correct amount ensures efficient cleaning and sparkling results.
Detergent Dispenser Operation
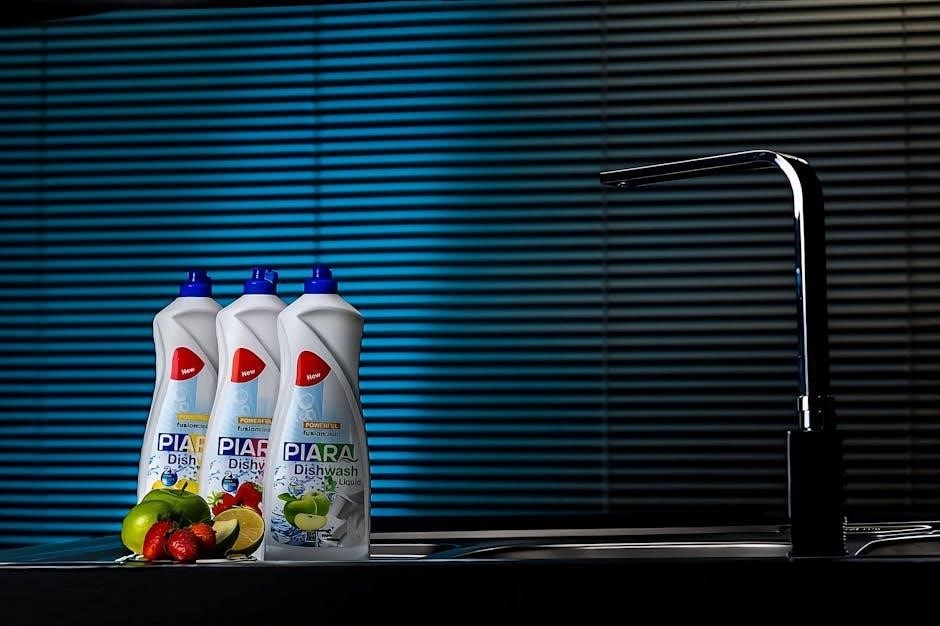
The detergent dispenser automatically releases detergent during the wash cycle, ensuring effective cleaning. Your Electrolux dishwasher’s dispenser has a compartment for powder or liquid detergent, and often a pre-wash compartment for heavily soiled loads. Always use dishwasher detergent specifically designed for automatic dishwashers; hand dish soap will create excessive suds.
Fill the main compartment just before starting the dishwasher, following the detergent manufacturer’s instructions for dosage based on water hardness and load size. For pre-wash, add detergent to the designated smaller compartment. Ensure the dispenser door closes securely. Some models feature automatic dispenser activation; others may require manual activation. Refer to your model’s specific instructions for optimal detergent delivery and cleaning performance.

Technical Specifications
This section provides essential details including model and serial number locations, energy consumption data, and water usage information for your Electrolux dishwasher.
Model Number & Serial Number Location
Locating your dishwasher’s model and serial numbers is crucial for accessing support, warranty services, and ordering replacement parts. These numbers uniquely identify your specific appliance. Typically, you’ll find this information on a sticker or plate affixed to the dishwasher’s frame.
Open the dishwasher door and carefully inspect the interior side walls. The label is often positioned along the edge of the door opening or on the inner side of the dishwasher’s frame, near the bottom. It might also be located on the back panel of the unit, requiring you to pull the dishwasher slightly away from the cabinetry for access.
The model number usually begins with letters indicating the product type, followed by a series of numbers. The serial number is a longer string of numbers and/or letters. Record both numbers in a safe place for future reference. Having these readily available will streamline any service requests or inquiries.
Energy Consumption Details
Understanding your Electrolux dishwasher’s energy consumption is vital for efficient operation and minimizing environmental impact. Energy usage varies based on the selected wash cycle, water temperature, and features utilized, such as heated drying.
Typical energy consumption for a standard wash cycle ranges from approximately 1.2 to 2.5 kilowatt-hours (kWh). Eco cycles are designed to use significantly less energy, often falling between 0.8 to 1.5 kWh. Always refer to the energy label affixed to your dishwasher for precise figures specific to your model.
To optimize energy savings, utilize eco cycles whenever possible, avoid pre-rinsing dishes excessively, and ensure the dishwasher is fully loaded. Selecting air-dry instead of heated drying can also substantially reduce energy consumption. Regularly maintaining your dishwasher, including cleaning the filters, contributes to efficient performance.
Water Usage Information
Efficient water usage is a key feature of Electrolux dishwashers, designed to minimize environmental impact and reduce utility bills. Water consumption varies depending on the chosen wash cycle and selected options. Standard wash cycles typically use between 10 to 15 liters of water per cycle.
Eco cycles are engineered for maximum water efficiency, often consuming as little as 6 to 9 liters per wash. The specific water usage for your model is detailed on the energy label. To further conserve water, always load the dishwasher fully, scrape off large food particles instead of pre-rinsing, and select the appropriate cycle for the load size.
Regular maintenance, including filter cleaning, ensures optimal water usage and prevents unnecessary re-washing. Consider utilizing the delay start function during off-peak hours to potentially lower water costs.